HOA Siding Replacement Plans for Multi-Building Communities
A siding project can look manageable until the first wall opens up. At that point, property managers and board members may suddenly face wet sheathing, missing kickout flashing, unbudgeted window repairs, and a construction schedule that disrupts hundreds of residents.
For condominium and townhome associations, HOA siding replacement is not merely a paint-color decision. It is a critical capital project that directly influences long-term property values, community curb appeal, and resident satisfaction. Managing these renovations requires a focus on legal, financial, and construction considerations.
The best projects start with a complete scope, a defensible funding plan, and a contractor who can manage the work building by building.
Key Takeaways
- Proactive Assessment: Do not rely on visual cues alone; conduct a professional condition assessment that includes minor test removals to identify hidden damage to sheathing, flashing, and water-resistive barriers.
- Standardized Scoping: Eliminate pricing discrepancies between bidders by creating a comprehensive, written project scope that details exact materials, repair unit prices for concealed conditions, and specific flashing requirements.
- Envelope-First Approach: Treat siding as a building envelope project rather than a cosmetic upgrade, ensuring that critical water management components like kickout flashing and roof-to-wall intersections are prioritized to prevent moisture intrusion.
- Financial and Resident Planning: Establish a robust funding plan that accounts for contingencies and market fluctuations, while maintaining clear, consistent communication with residents to manage disruptions during construction.
Start With a Community-Wide Condition Assessment
Replacing siding on one building simply because it looks weathered is a reactive measure. Replacing siding across a community without a professional condition assessment is expensive guesswork that often leads to significant deferred maintenance. Homeowners Associations should proactively identify failing systems before they become emergencies.
The board needs a clear picture of what is failing, where it is failing, and whether the visible siding is the primary source of the problem. Cracked panels, swelling trim, loose vinyl, peeling paint, and repeated water stains all deserve attention. These signs do not automatically mean every elevation needs a full replacement.
A qualified exterior contractor, building envelope consultant, or architect should perform a visual inspection of representative buildings and document the findings. The inspection should include walls with the heaviest weather exposure, roof to wall transitions, decks, patios, windows, doors, chimney chases, and utility penetrations.
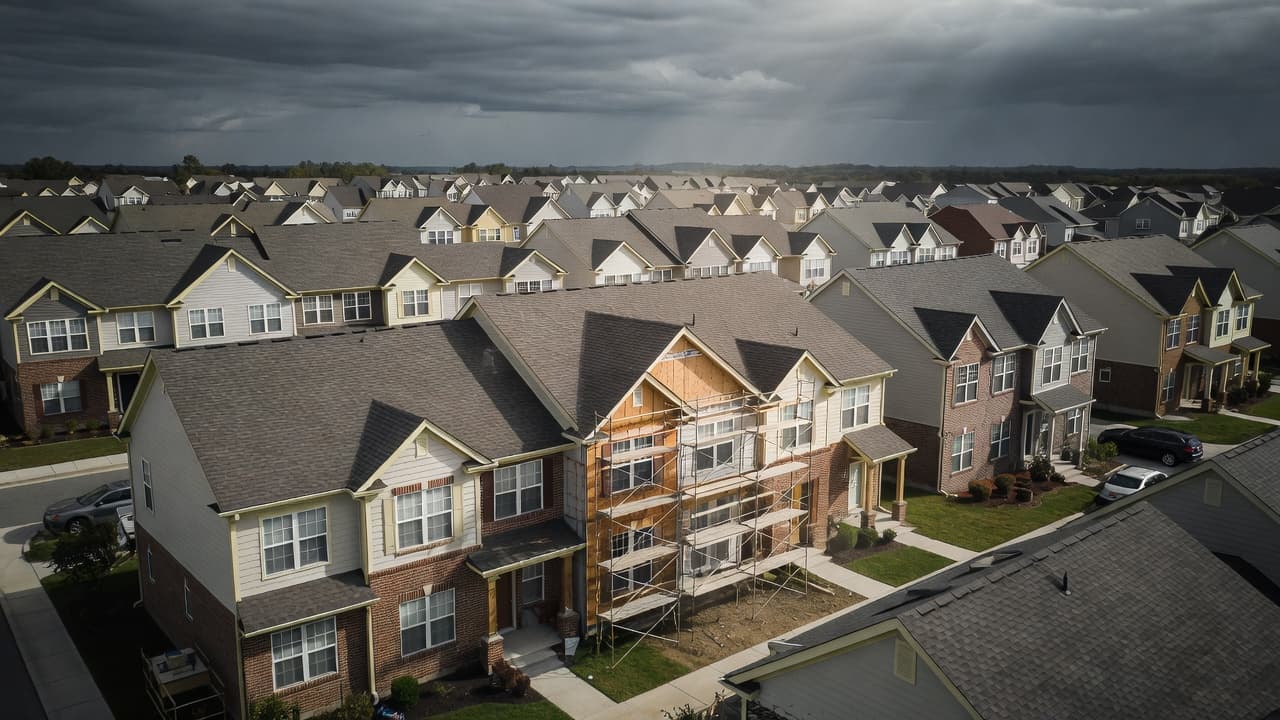
For a multi-building community, the report should identify each building by address or building number. Broad statements, such as saying siding is near the end of its life, are not enough for board action or accurate bid comparison.
Document these conditions in the assessment:
- Areas of deteriorated siding, trim, soffit, fascia, and general exterior maintenance needs
- Soft, stained, delaminated, or otherwise damaged sheathing
- Failed caulk joints around windows, doors, corners, and penetrations
- Improper flashing at roofs, decks, ledger boards, windows, and doors
- Signs of moisture intrusion, wood rot, insect damage, or mold
- Buildings with different siding types, repair histories, or exposure conditions
A small test removal can answer questions that a visual inspection cannot. It may show whether housewrap is intact, whether the wall has a drainage gap, or whether the substrate can hold new cladding. That information belongs in the pre-bid scope.
If the bid assumes sound sheathing and the walls prove otherwise, the association has not received a fixed project price. It has received a starting number.
Review the association declaration, bylaws, rules, plat information, and maintenance matrix before the project scope is set. In many communities, the association maintains siding but owners remain responsible for limited components such as doors, windows, patios, or owner installed fixtures. Those boundaries need to be resolved before crews arrive.
Local building codes also matter. A siding replacement may trigger requirements for water resistive barriers, flashing, fastener schedules, ventilation details, or permits. Review governing documents, local code requirements, and reserve study recommendations with qualified legal, design, and construction professionals.
Define the Scope Before Asking Contractors for Prices
A contractor cannot price what the board has not defined. The result is usually a stack of contractor bids that look comparable but include different materials, different repairs, and different exclusions.
Build a written scope that applies to every bidder. It should state which buildings are included, whether all elevations are included, the approved siding profile, trim package, color selections, and the expected treatment of concealed damage. This document ensures that all siding contractors are providing quotes based on the exact same requirements.
For example, “replace siding as needed” is not a scope. A workable scope identifies the cladding system, substrate assumptions, flashing details, demolition requirements, and repair unit prices.
The document should answer practical job-site questions:
- Will contractors remove existing siding or install over it where code permits?
- Is new housewrap required on every exposed wall, or only where the existing barrier is damaged?
- What flashing must be installed at windows, doors, roof intersections, deck ledgers, and penetrations?
- How will damaged OSB, plywood, framing, and insulation be priced and approved?
- Who removes and reinstalls lights, hose bibbs, address numbers, shutters, railings, cameras, and exterior outlets?
- Are gutters, downspouts, roof edges, and landscaping included in the work?
The last point catches many boards off guard. Within multifamily communities, siding, roofing, gutters, and window flashing meet at the same wall plane. A contractor who replaces cladding but ignores roof-to-wall flashing can leave the original leak path in place.
Require unit prices for common concealed conditions. Typical units include sheathing by square foot, framing by lineal foot, insulation by square foot, and window or door flashing by opening. Unit pricing does not eliminate change orders, but it prevents every damaged panel from becoming a separate negotiation.
Use one written process for approving concealed-condition work. The contractor should provide photographs, location details, quantity, and proposed cost before covering the repair. Effective project management requires that the manager or designated board representative has authority limits in writing. Otherwise, a superintendent waits for answers while the schedule stalls.
Select Materials That Fit the Buildings, Budget, and Maintenance Plan
No siding material is entirely maintenance-free. Every product has specific installation rules, accessory requirements, weather limitations, and repair considerations that associations must evaluate.
Fiber cement siding, including popular brands like James Hardie, is common in association projects because it offers a consistent finish and broad trim options. These materials require correct clearances, proper fasteners, controlled cuts, and disciplined flashing. If fiber cement siding is installed tight to roofing, grade, or horizontal surfaces, it will absorb moisture at vulnerable edges.
Engineered wood products, including LP SmartSide, can work well when installed exactly to manufacturer requirements. The details matter, including ground clearance, edge sealing, flashing, fasteners, and paint maintenance. A board should not assume a wood-based product will tolerate deferred caulking and repainting.
Vinyl siding often has a lower installed cost and does not require painting. It can be an appropriate choice for certain townhome communities, but color matching after years of sun exposure can be difficult. Successful vinyl siding installations also require correct nail spacing and allowance for thermal movement. If panels are nailed too tight, they will buckle.
Metal panels may fit modern multifamily buildings or areas with severe impact exposure. They need careful detailing around openings and transitions, as they are not a shortcut around proper water management.
This comparison helps boards frame the discussion before final specifications are issued and ensures the chosen material aligns with community standards.
| Material | Common strengths | Planning concerns |
|---|---|---|
| Fiber cement | Stable appearance, broad design options, noncombustible material | Installation details, painting, cut-edge treatment |
| Engineered wood | Lighter boards, familiar appearance, efficient installation | Clearances, paint upkeep, strict manufacturer details |
| Vinyl | Lower maintenance, lower installed cost in many markets | Fading, impact damage, movement, accessory matching |
| Metal panels | Durable finish options, modern appearance, low maintenance | Transition details, denting, higher design coordination |
The material decision should match the long-term maintenance plan for the community, not a sales presentation. Ask for manufacturer installation instructions and warranty terms before approval. Confirm whether the selected installer meets any certification or credential requirements.
Visual consistency is equally important. A 40-building community can look patchy within a few years if the board permits multiple profiles, trim widths, corner treatments, and color substitutions. Set the approved siding product, color, exposure, trim style, soffit finish, and accessory colors in a board resolution or architectural standard.
Keep spare material from the project. Store labeled cartons of siding, trim, and accessories in a dry location if the association has storage space. Even a modest repair stock can save time when a future storm damages one wall.
Build a Funding Plan That Can Survive Field Conditions
The reserve study serves as a foundational planning tool, but it is not a definitive construction estimate. While it provides a useful replacement year and a target for your reserve funds, it cannot see behind walls or accurately account for current market fluctuations.
Start by comparing the reserve study assumptions against your formal condition assessment and current contractor pricing. If the reserve component is underfunded, the board must decide whether to phase the work, increase monthly contributions, secure a loan, levy a special assessment, or combine these strategies.
Do not set the project budget based solely on the lowest proposal. Your financial planning must include design or consulting fees, permit costs, diagnostic testing, temporary site protection, landscape restoration, a contingency fund, and any financing expenses. Your contingency budget should reflect the building age and known risk factors. For example, walls with visible water damage require a larger allowance than dry, recently built structures.
The board should also carefully weigh the project timeline. A full-community replacement may reduce unit costs and produce a more uniform result, but it creates a larger financial burden and more resident disruption in a single season. A phased plan lowers the immediate cost for the condo owners association, but it can increase total expenses over time and complicate color matching between phases.
There is no universal solution. The final decision should align with the association’s cash position, the current status of reserve funds, building conditions, and overall borrowing capacity.
A cheap bid with broad exclusions is not true budget control. It merely shifts uncertainty from the contractor’s proposal directly to the association’s balance sheet.
Require itemized bids categorized by building or phase. Proposals should clearly separate base siding work from allowances, alternates, and unit prices. They must also identify permit responsibilities, dumpster locations, site supervision, warranty terms, payment schedules, insurance limits, and expected crew size.
When reviewing contractor insurance certificates, do not stop at a surface-level check. You must ensure full insurance compliance by confirming general liability, workers compensation, automobile coverage, and umbrella coverage with the association’s professional insurance advisor. Always ask if subcontractors will be used and verify how their specific coverage is managed.
For large-scale projects, a construction attorney should review the final contract. The agreement must address change orders, payment timing, lien waivers, warranty response protocols, dispute procedures, site protection, and termination rights. Board minutes should clearly document why the board selected the chosen contractor, which alternatives were considered, and the formal process used to approve the funding.
Phase Construction to Limit Resident Disruption
Residents can tolerate noise and temporary access limits when the association provides accurate information. They become frustrated when crews appear without notice, parking disappears, and no one can answer basic questions.
A phased HOA siding replacement plan should group work by building, rather than by scattered walls throughout the community. Complete a building or a defined cluster before moving crews elsewhere. This reduces mobilization, keeps materials contained, and gives residents a clear start and finish window.

Before each phase begins, prioritize clear resident communication. Send notices by the communication methods allowed in the governing documents, such as email, portal notice, mailed letter, and posted notice. Give residents a realistic lead time, then send a short reminder before mobilization. Effective resident communication is vital for Homeowners Associations to maintain order and limit the impact of large scale renovations on daily living.
The notice should cover work dates, working hours, parking restrictions, access limits, noise expectations, pet precautions, balcony or patio clearing, window covering recommendations, and a project contact. It should also explain that dates can move because of weather or concealed repairs.
Some access issues require individual coordination. Residents may work from home, need accessible parking, have medical equipment near exterior outlets, or keep pets that react badly to construction activity. The manager should collect those requests early. The contractor cannot solve a special access issue after scaffolding is in place.
Daily site control matters. Crews should secure ladders, keep paths clear, protect windows and landscaping, manage nails with magnetic sweepers, and remove loose debris before leaving. A clean site is not just cosmetic. It limits injuries, complaints, vehicle damage claims, and fire risk.
Require a designated superintendent who can make field decisions and communicate with the manager. The board should not become the contractor’s daily dispatch office. One point of contact prevents contradictory instructions and keeps the project record clean.
Treat Flashing, Housewrap, and Sheathing as Part of the Siding Work
Siding is the visible layer, but water management behind the cladding determines whether the wall assembly stays dry. Protecting the building envelope is critical to long-term performance.
Every siding replacement scope should identify how the contractor will inspect and repair water-resistive barriers, window flashing, kickout flashing, and roof-to-wall intersections. These hidden details are easy to overlook during initial assessments and expensive to revisit once the project is underway.
Kickout flashing is a frequent trouble spot. It sits where a roof edge ends against a sidewall and directs water into a gutter. When this component is missing, roof runoff can dump behind the siding, causing significant moisture intrusion that soaks the wall cavity. Replacing siding without correcting that condition is essentially a failed repair.
Window and door details need equal attention. The flashing sequence must direct water outward rather than trapping it behind tape or trim. Existing windows may have limited flashing, damaged nailing fins, or failed sealants. The contractor should photograph these conditions before installing new cladding to ensure a complete record.
Sheathing repairs need clear standards. Some damage is limited to a small section around a failed penetration, but if left unaddressed, moisture exposure can lead to extensive structural damage that extends into framing, insulation, or interior finishes. The board needs a defined escalation process for when repairs exceed the unit-price allowance or reveal deeper structural concerns.
Do not accept a blanket instruction to replace rotten wood as needed. Ask how the contractor identifies rot, who verifies the quantity, and what documentation supports the change order. A photo without an address, elevation, or measurement is weak project documentation.
The project team should inspect representative walls before they are covered. For larger communities, consider a pre-construction mockup or a first-building review. Confirm siding layout, trim details, flashing, fastener placement, caulk joints, and finished appearance before the same work repeats across twenty buildings.
Keep a Board Record That Holds Up Later
Boards change and managers rotate. Ten years after a siding replacement project, a future board member may ask why Building 14 required new sheathing, why the exterior color was changed, or whether a contractor warranty remains active.
Create a comprehensive project file that includes the condition assessment, reserve study excerpts, board resolutions, meeting minutes, bids, contracts, certificates of insurance, permits, product data, color approvals, payment applications, change orders, inspection reports, photographs, lien waivers, and warranty documents.
Minutes should record the final decision rather than every individual discussion. Clearly state the motion, the board vote, the selected contractor, the approved amount, the specific funding source, contract authority, and any owner notice requirements. If the board rejects a lower bid due to an incomplete scope of work, weak supervision, poor references, or specific exclusions, record the basis for that decision in the official files.
A final closeout package should include a building by building completion list and a punch list record. Confirm that debris is removed, gutters are reinstalled where required, damaged landscaping is addressed, and all exterior accessories are back in their original places.
Walk the finished work with the contractor before issuing the final payment. Check transitions, caulk joints, trim alignment, exposed fasteners, flashing, siding clearances, downspout locations, and any visible damage. Hold retainage if the contract allows until all punch list work is complete.
Frequently Asked Questions
Can we just replace the siding without addressing the sheathing or flashing?
No, replacing siding without addressing the underlying building envelope is often a wasted investment. Damaged sheathing or improper flashing will continue to allow water intrusion, potentially leading to rot and mold behind the new cladding.
Why do we need unit pricing for concealed conditions?
Unit pricing allows the board to establish pre-approved rates for repairs that cannot be identified until the old siding is removed, such as rotted framing or damaged OSB. This prevents every instance of concealed damage from requiring a new, time-consuming contract negotiation.
How should we handle resident disruption during the project?
Phasing the construction building-by-building rather than scattered across the property allows for a clear, predictable schedule. Providing consistent, advance notice through established communication channels helps residents prepare for noise, limited access, and parking changes.
Should the board always choose the lowest bid?
Not necessarily, as low bids often include broad exclusions or lack critical requirements that lead to expensive change orders later. A professional, detailed bid that accounts for the specific needs of the association is typically more cost-effective and provides better budget control than a low-cost, vague proposal.
A Controlled Siding Project Protects More Than Appearance
A multi-building siding project succeeds when the board treats it as a building envelope program rather than a simple cosmetic upgrade. The work must address the wall behind the cladding, the budget behind the contract, and the residents living beside the job site.
The strongest HOA siding replacement plans rely on a complete scope, consistent materials, documented decisions, and disciplined field inspection. By following this structured approach, an association protects its assets and financial health while avoiding the common pitfall of paying twice for the same wall. Ultimately, a well-managed HOA siding replacement program ensures the long-term value and structural integrity of the entire community.